Layout Management
The CitizenOne Management application allows you to configure the layout of the login screen for end users, including adding external IDPs that can be used to login to CitizenOne.
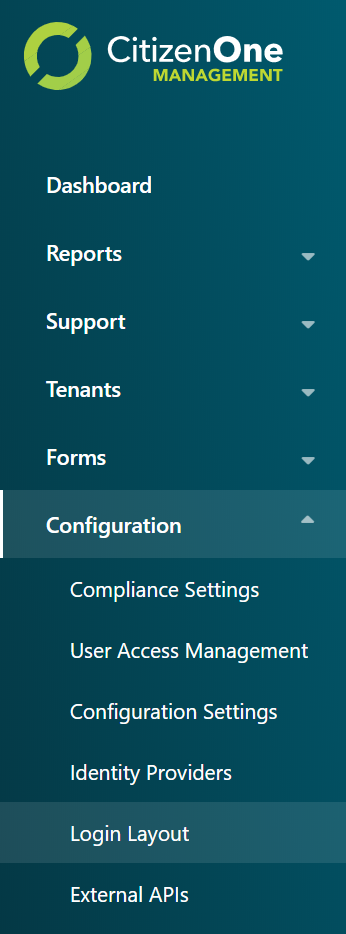
The layout management page can be accessed by clicking [Login Layout] under the [Configuration] tab of the sidebar.
Viewing the Login Layout
The Login Layout page displays a preview of what the CitizenOne login page will look like to end users.
Adding a Widget to the Layout
To add a Widget to the login page, select a Widget that hasn’t been added and click the [+ Add Widget} button.
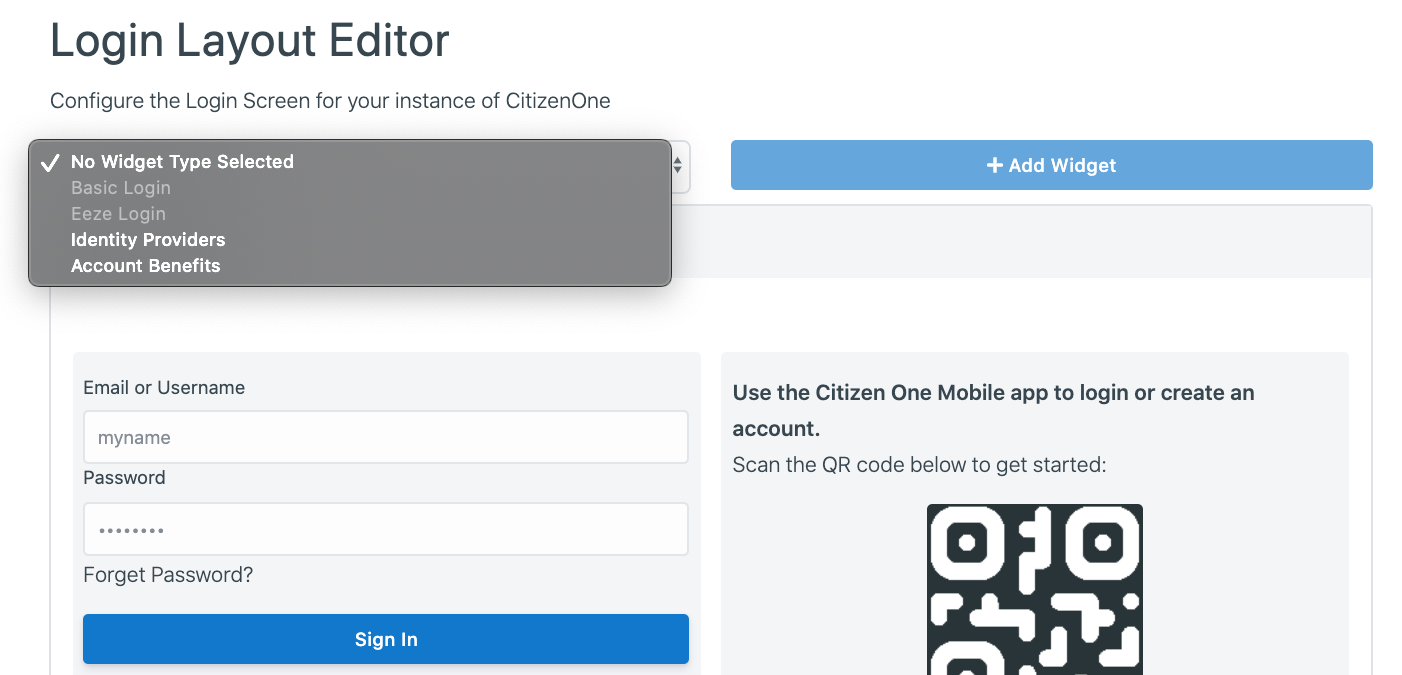
Once a Widget has been added, it can now be configured.
Editing a Widget in the Layout
To edit a Widget in the layout, click on the Widget in the preview and a configuration form for the Widget will appear.
1. Basic Login Widget
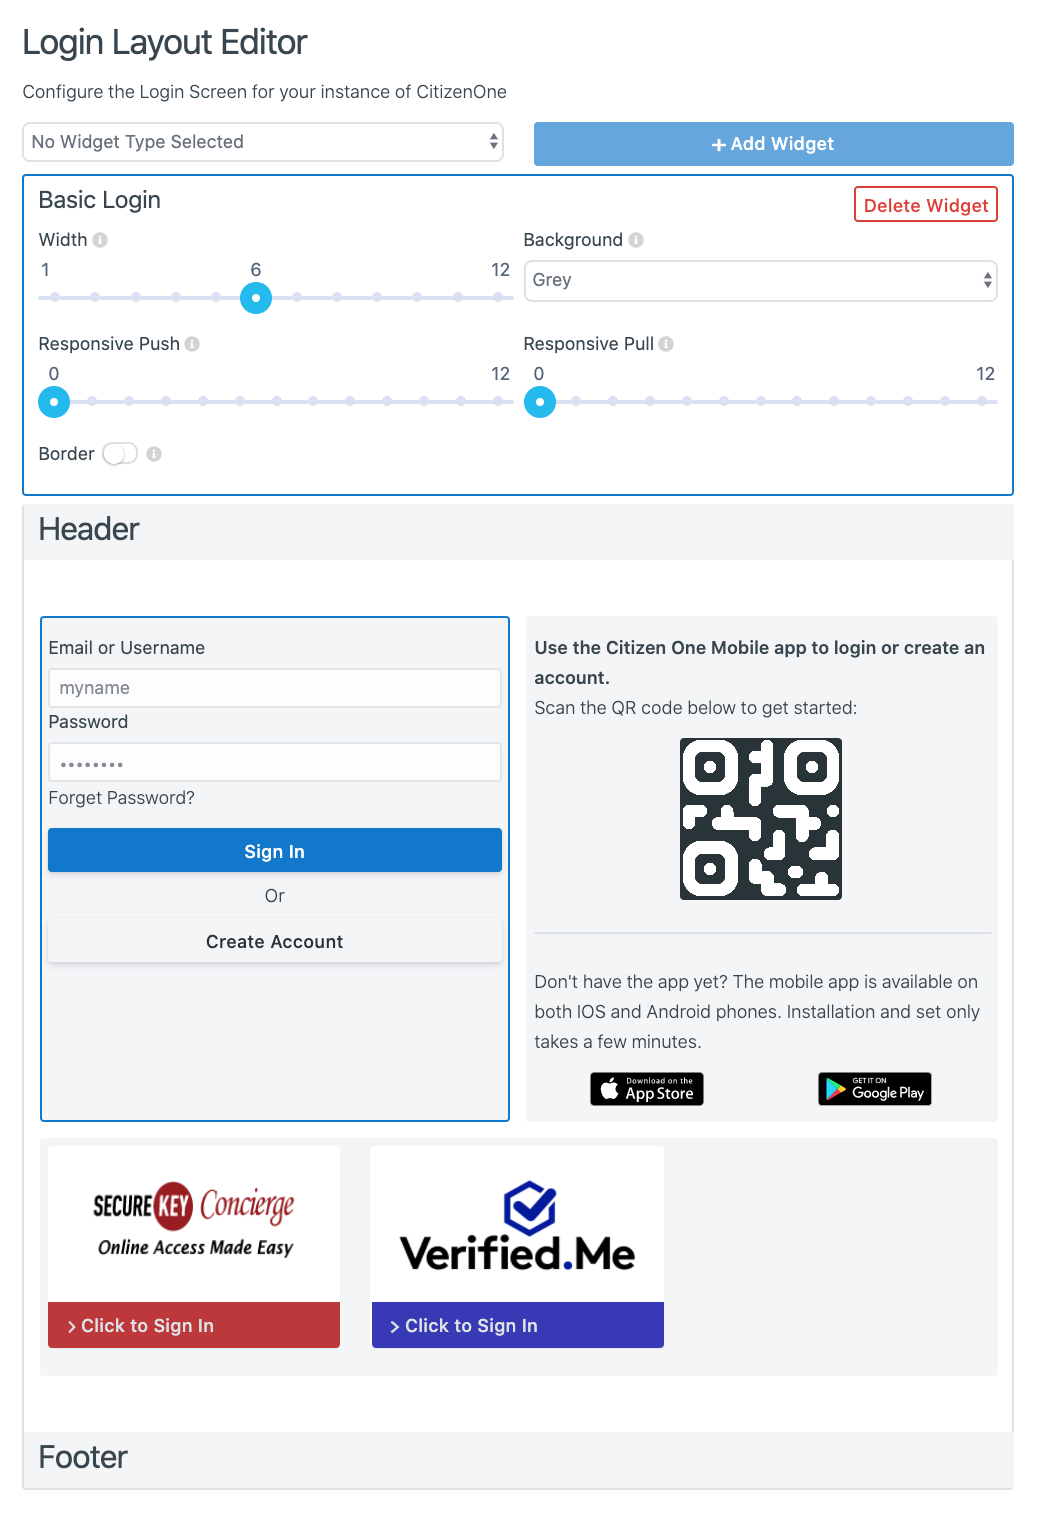
The configuration options for the Basic Login Widget are:
Width: The number of Bootstrap columns on the page the widget spans
Background: The background colour of the widget
Responsive Push: Changes the order of columns for non-mobile views. See Bootstrap’s ‘col-md-push’. If unsure, leave at 0 to disable.
Responsive Pull: Changes the order of columns for non-mobile views. See Bootstrap’s ‘col-md-pull’. If unsure, leave at 0 to disable.
Border: If enables, a light border will appear around the widget
2. Eeze Login Widget
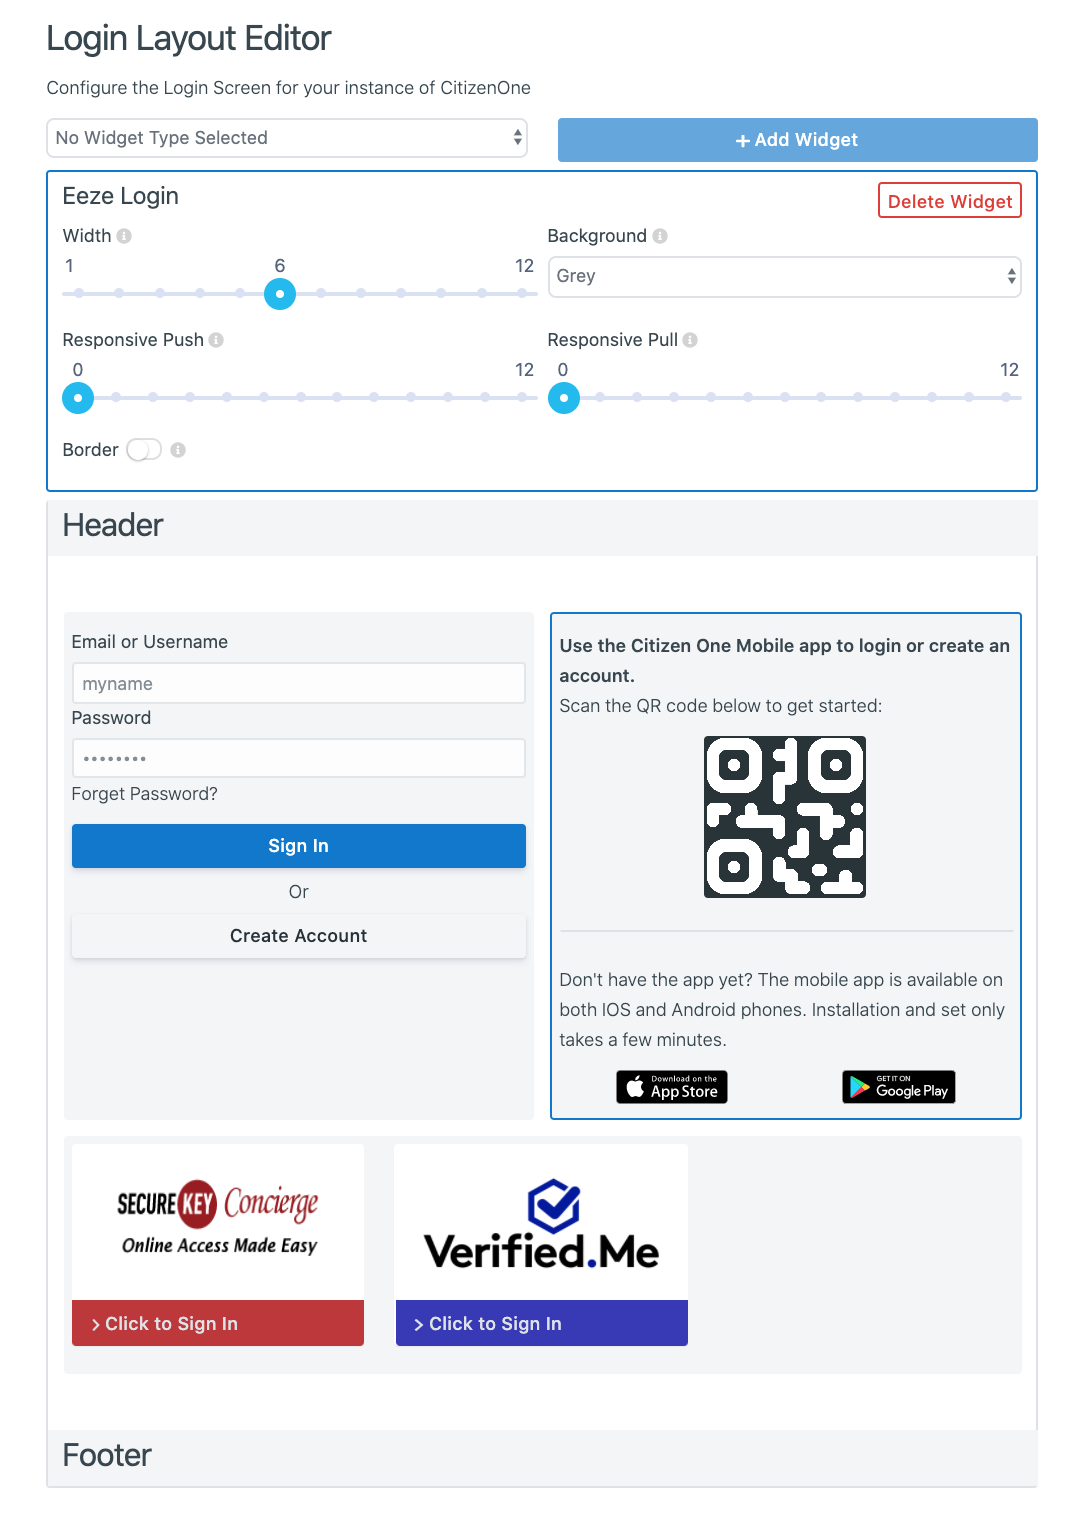
The configuration options for the Eeze Login Widget are:
Width: The number of Bootstrap columns on the page the widget spans
Background: The background colour of the widget
Responsive Push: Changes the order of columns for non-mobile views. See Bootstrap’s ‘col-md-push’. If unsure, leave at 0 to disable.
Responsive Pull: Changes the order of columns for non-mobile views. See Bootstrap’s ‘col-md-pull’. If unsure, leave at 0 to disable.
Border: If enables, a light border will appear around the widget
3. Identity Providers Widget
The configuration options for the Identity Providers Widget are:
Width: The number of Bootstrap columns on the page the widget spans
Background: The background colour of the widget
Responsive Push: Changes the order of columns for non-mobile views. See Bootstrap’s ‘col-md-push’. If unsure, leave at 0 to disable.
Responsive Pull: Changes the order of columns for non-mobile views. See Bootstrap’s ‘col-md-pull’. If unsure, leave at 0 to disable.
Border: If enables, a light border will appear around the widget
Provider Width: The width of each Identity Proivder’s card on the login page
To add and configure a new Identity Provider, please refer to Identity Providers on the Login Screen
4. Account Benefits Widget
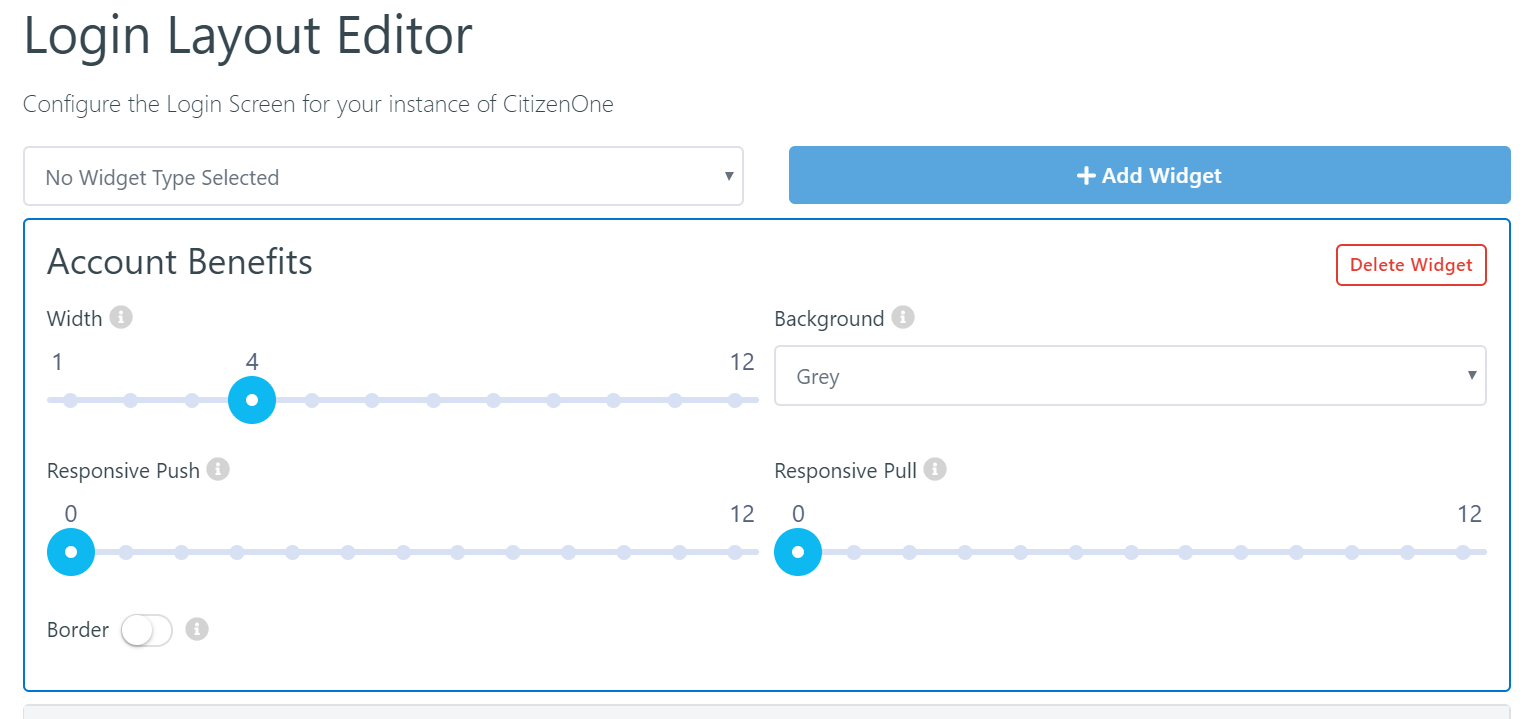
The configuration options for the Eeze Login Widget are:
Width: The number of Bootstrap columns on the page the widget spans
Background: The background colour of the widget
Responsive Push: Changes the order of columns for non-mobile views. See Bootstrap’s ‘col-md-push’. If unsure, leave at 0 to disable.
Responsive Pull: Changes the order of columns for non-mobile views. See Bootstrap’s ‘col-md-pull’. If unsure, leave at 0 to disable.
Border: If enables, a light border will appear around the widget
Deleting a Widget in the Layout

To delete a Widget from the login page, first click on the Widget from the preview layout to open the configuration form for that Widget.
In the top right of this form, click the [Delete Widget] button to remove the Widget.
Saving a Layout
Changes to the layout do not save automatically. When you are done making changes to the layout, click the [Save All] button at the bottom of the page.
Undo Changes to a Layout
If you have made changes to the layout and have not saved them yet, click the [Cancel All] button at the bottom of the page to go back to the last saved layout.